
Formations decide more futsal matches than talent does. I grew up playing small-sided football in Malta, and the teams that won week after week were rarely the most gifted. They were the ones that knew their shape and stuck to it.
This article covers the four formations you'll actually see on court (the 2-2, the 3-1, the 1-2-1 and the 4-0), with the strengths and weaknesses of each, so you can pick the one that fits the players you have, not the players you wish you had.
Key Takeaways
| Formation | Shape | Best for | Main risk |
|---|---|---|---|
| 2-2 | Two defenders, two attackers | Teams that want equal defensive and attacking strength | Predictable; slow transitions |
| 3-1 | One defender, three forwards | Attack-minded teams that dominate possession | Exposed to counter-attacks |
| 1-2-1 | Diamond, built for quick transitions | Versatile squads that switch fast between defence and attack | Needs well-rounded players in every spot |
| 4-0 | Four rotating outfielders, no fixed defender | Highly skilled squads with excellent ball handling and rotation | One lost ball leaves the back wide open |
Formation Basics
A formation exists to get the most out of your attack and defence in a very small space. The right one plays to your strengths and covers your weak spots; the wrong one gets exposed within minutes.
Three things should drive the choice: your players' skills, the opponent's approach, and the state of the match. There is no single best shape, only the best shape for the squad you're putting on court that night.
2-2 Formation: A Classic Approach to Futsal
Description and Setup
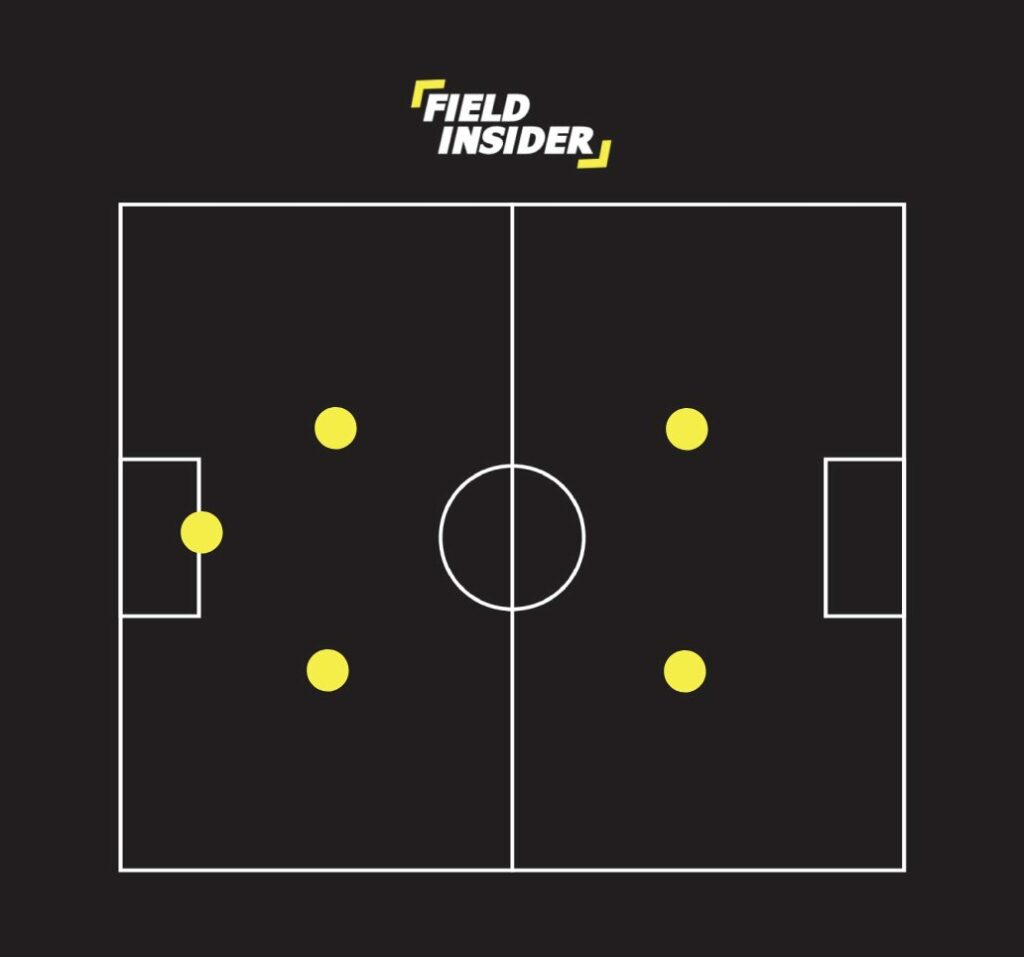
The 2-2 is the classic futsal shape: two players hold the back, two press ahead to disrupt the opposition's lines. It gives you an even split between attack and defence, and everyone knows exactly what their job is. Almost every futsal team I played against ran this shape, and for good reason.
Advantages
Balance. You can defend deep and still push forward with confidence, and the clear division of roles keeps players well positioned for most situations the game throws at them.
It suits teams that prefer a methodical, controlled game over chaos.
Disadvantages
The trade-off is predictability. Opponents playing more fluid shapes can pull the two lines apart, and the rigidity slows your transitions from defence to attack.
Quick, agile sides will punish that in fast-paced games.
Ideal For
Squads that value structure and discipline over risk, where each player knows their role and sticks to it.
If you want to build on this base, our guide to 5-a-side defending covers how to keep the balance between attack and defence intact.
3-1 Formation: Aggressive Attacking Strategy
Description and Setup
The 3-1 pushes three forwards high to maximise your attacking presence, with a single defender back to guard against counters.
It's built for teams that want to dominate possession and go straight at the opponent's defence, a favourite of sides with confident, attack-minded players.
Advantages
The obvious one: continuous pressure on the opposition's defence.
All that pressure creates scoring chances, which is why it suits forward-focused players who can hold the momentum and exploit gaps in the defence.
Disadvantages
The moment you lose the ball, you're exposed to the counter-attack.
Your lone defender has to be genuinely good, and the front three need the stamina and defensive discipline to track back fast. Otherwise you'll concede on the break all night.
Ideal For
Teams that excel going forward, press high, and can keep that up for the full match. It rewards potent attackers and quick transitions from defence to offence.
For more on the roles involved, see our piece on attacking football positions.
1-2-1 Formation: Flexibility and Swift Transitions
Description and Setup
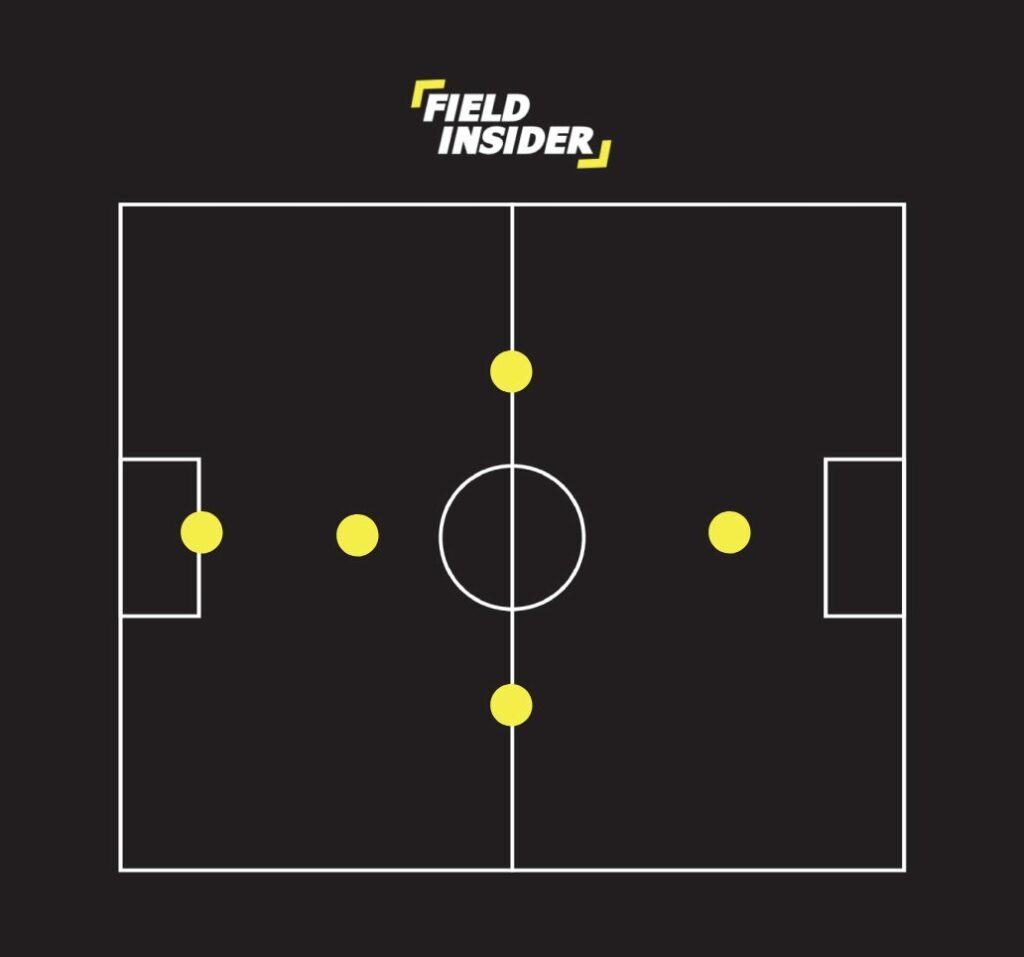
The 1-2-1, the diamond, is built around swift transitions between defence and attack.
It's the shape for teams that read the game well and adapt quickly when the pattern of the match changes.
Advantages
Adaptability. The team shifts seamlessly between attacking and defending modes, which lets you respond to whatever the opponent tries and exploit openings as they appear.
It's also tailor-made for quick counter-attacks while still covering the defensive end.
Disadvantages
Everyone has to do several jobs. Each player must be capable of performing multiple roles efficiently.
If your squad lacks versatile players, or isn't used to swapping roles mid-play, gaps open up at one end or the other.
Ideal For
Balanced teams with all-round skill sets that can flip from defence to attack in a pass or two.
Our guide to the counter-attack in futsal pairs well with this shape and shows how to get the most out of it.
4-0 Formation: Total Control and Continuous Movement
Description and Setup
The 4-0 scraps the fixed defender entirely. Four outfield players rotate constantly and share defensive and attacking duties between them, prioritising total ball control.
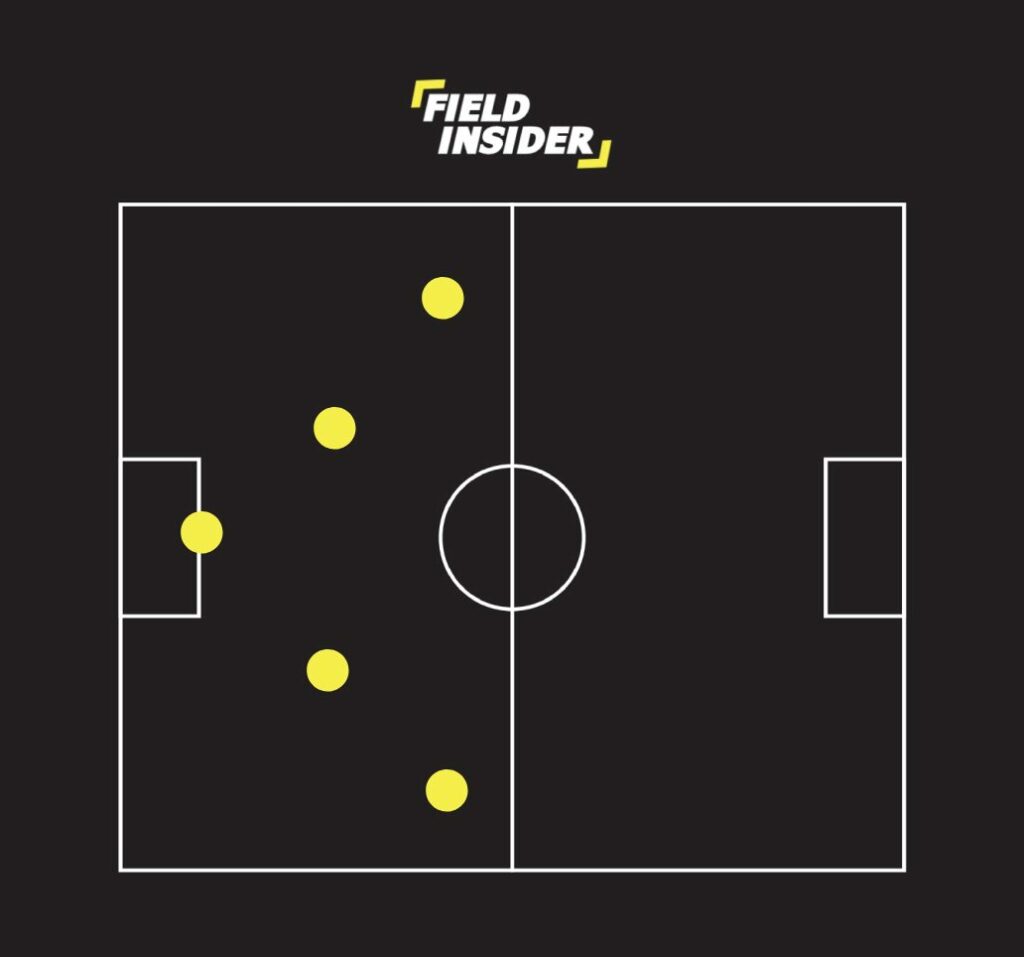
It demands exceptional teamwork, understanding and technique. There's nowhere to hide.
Advantages
Unpredictability. Constant rotation disorients the opposition, creates mismatches and opens defensive gaps.
It's excellent for keeping possession and dictating the pace. Opponents can never anticipate the next move.
Disadvantages
Lose the ball and there's nobody home at the back. The 4-0 needs high technical skill, serious conditioning and constant spatial awareness, plus the speed to recover before the counter arrives.
My honest take: for amateur sides the 4-0 is overkill: one sloppy touch and you're picking the ball out of your own net.
Ideal For
Highly skilled squads who excel at ball handling, positional awareness and teamwork, and who can hold concentration and coordination for the whole match.
If that fluid style appeals to you, our guide to 5-a-side attacking goes deeper on keeping control and creating chances in small-sided games.
Mastering Futsal: Intensity and Formation Tactics
The graph below comes from the study, “Physical and physiological demands of futsal”. It shows the varying intensity levels players go through during a match, and those levels shape how any formation actually holds up.
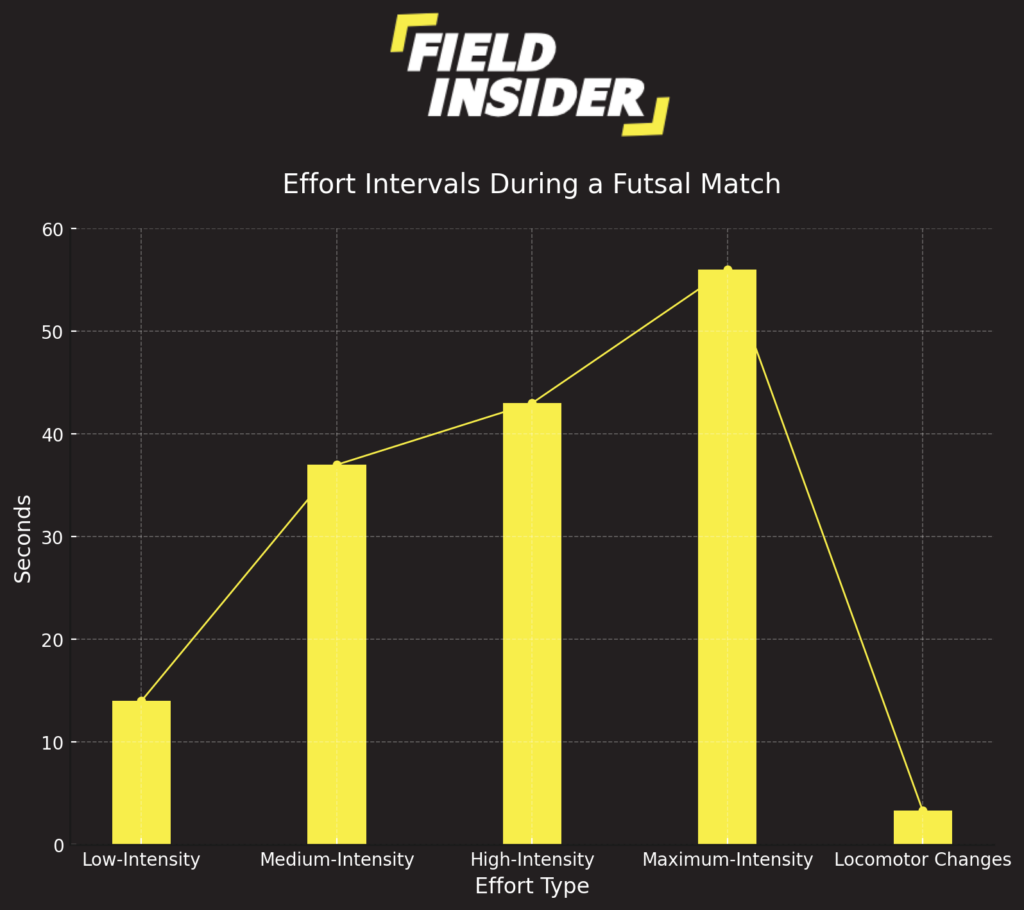
Low-intensity efforts happen constantly: that's players holding position and keeping shape. High-intensity bursts are rarer but decide the sudden attacking and defensive shifts. Your formation has to match your team's stamina, not just its skill.
That's another lens for the choice: the balanced 2-2, the aggressive 3-1, the flexible 1-2-1 and the dynamic 4-0 each place very different physical demands on the players running them.
Conclusion
Pick the formation that fits your players, not the one that looks best on a whiteboard. The 2-2 gives you balance, the 3-1 gives you attack, the 1-2-1 gives you flexibility, and the 4-0 gives you control, at a price.
Weigh your players' strengths, the opponent's strategy and what you need from the match, and the right shape follows from there.